How to run Debian or Ubuntu GNU/Linux on your Android
Integrating GNU/Linux with Android The Matrix Way

The most seamless way extending your Android device with a full blown GNU/Linux such as Debian (or Ubuntu) is running the Android system in a chroot environment in the Debian file system. This way you can access the Android system from Debian without restrictions at the same time no modifications to the Android system itself are needed.
This description requires general computer skills such as GNU/Linux but not necessary specific knowledge about Android - but it sure helps. You will have to install the Android SDK toolkit, and if you are not comfortable running pre-compiled binaries from dubious sources, you may have to get at least parts of the Android OS source code as well.
A new init procedure mounting a new root file system, transferring control to the Android init in a chroot environment is implemented as described here below. The pros compared to other methods are many.
Features
- Full GNU/Linux Debian installation with lots of apt-get:able packages
- Full control of the Android environment from Debian
- Simultaneous use of Debian as well as Android
- Access the Android file system from your workstation desktop via ssh/sftp
- No need to unmount/remount the SDcard accessing it via ssh/sftp
- Makes it easy to backup both the Android as well as the Debian system
- Android system untouched and unaware of any modifications
- Android root file system no longer volatile, edits are kept between reboots
- Critical file systems kept on SDcard for easy access in case of major f**k up
- Graphic X11 Windows user interface, both client and server, local and remote, native, over SSH or VNC
- Zero performance impact
- Easy to modify your Android ROM selectively, without the need to reflash the entire device.
- Manage your Android device as any other GNU/Linux system
Requirements (click on each topic for more info)
- Android SDK toolkit
- Your Android device boot image and the ability to flash your device (or your favorite ROM)
- A static linked binary of busybox for the ARM architecture
- An SDcard, preferable fast (class 10) and large capacity (32GB)
- A GNU/Linux machine with an SDcard reader
- Root access on the Android device (makes things smoother, but in the end you'll get it anyway)
Steps
- Partition an SDcard into two partitions, one FAT, one GNU/Linux (e.g. ext3 or ext4)
- Create a new initramfs to flash the device with
- Create a Debian root file system on the second partition of the SDcard
- Copy the original Android root file system to /android in the Debian file system tree
Disclaimer - The instructions here are not for your device explicit, and you can not follow them by the letter, but have to adjust them for your telephone or tablet. Most often I've highlighted what you may need to change. If you're not experienced flashing you phone there's also a risk you render it useless, becoming the proud owner of an expensive brick. This solution is primary intended for the experienced GNU/Linux hacker, system administrator or app developer wanting full control over the Android device using a standard GNU/Linux environment. For the novice wanting to run GNU/Linux on his mobile device for the fun of it, there are other less powerful solutions I'd recommend before this one.
Partition the SDcard
Get a large capacity SDcard and create two partitions. Make sure it's fast as well (class 10). Make the first partition the standard FAT file system used by various apps. Make the second a GNU/Linux partition for the Debian root filesystem. Use ext4 if your Android kernel supports it, else chose the best supported. Look in /proc/filesystems, /proc/config.gz or so on your device. Partitions the SDcard on your ordinary GNU/Linux machine using fdisk. Keep the sector boundaries aligned with the factor as the first partition on the card when shipped. This will ensure partition aliment for best performance. Some solid state disks gets terrible performance unaligned.
At your desktop computer
root@workstation:~# fdisk -cu /dev/sdf

Command (m for help): p

Disk /dev/sdf: 32.0 GB, 32018268160 bytes
170 heads, 53 sectors/track, 6940 cylinders, total 62535680 sectors
Units = sectors of 1 * 512 = 512 bytes
Sector size (logical/physical): 512 bytes / 512 bytes
I/O size (minimum/optimal): 512 bytes / 512 bytes
Disk identifier: 0x00000000

   Device Boot      Start         End      Blocks   Id  System
/dev/sdf1              53    13839359     6919653+   c  W95 FAT32 (LBA)
/dev/sdf2        13839360    62529399    24345020   83  Linux
Here the alignment is 53 sectors, i.e. even tracks, so I make sure the start sector of both partitions is a multiple of this. I chose to split 32G into 8G FAT plus 24G ext4. The Debian base environment including X11 is just above 1GB in size, so 24G may be overkill.
Create new file systems with mkfs.
At your desktop computer
# mkfs -t vfat /dev/sdf1
# mkfs -t ext4 /dev/sdf2
Creating the initramfs
Replace the initramfs shipped with your device with your own modified. Use an init mounting a new root file system from the SDcards GNU/Linux partition and transfer control to this.
Below is an example of the /init of the initramfs file system. It must be named /init because this is hardcoded into the Android kernel to execute upon boot. You most certainly need to change /dev/mmcblk1p2 to the name of your SDcard second partition.
On The ASUS Transformer TF101 the second partition is named /dev/mmcblk1p2 but look at your device to see what your is called.
From your desktop shell to your Android device
$ adb shell
$ mount
rootfs / rootfs ro,relatime 0 0
tmpfs /dev tmpfs rw,relatime,mode=755 0 0
devpts /dev/pts devpts rw,relatime,mode=600 0 0
proc /proc proc rw,relatime 0 0
sysfs /sys sysfs rw,relatime 0 0
tmpfs /mnt/asec tmpfs rw,relatime,mode=755,gid=1000 0 0
tmpfs /mnt/obb tmpfs rw,relatime,mode=755,gid=1000 0 0
/dev/block/mtdblock0 /system yaffs2 ro,relatime 0 0
/dev/block/mtdblock3 /data yaffs2 rw,nosuid,nodev,relatime 0 0
/dev/block/mtdblock2 /cache yaffs2 rw,nosuid,nodev,relatime 0 0
/dev/block/mtdblock1 /data/idd yaffs2 rw,nosuid,nodev,relatime 0 0
/dev/block/vold/179:1 /mnt/sdcard vfat rw,dirsync,nosuid,nodev,noexe ...
/dev/block/vold/179:1 /mnt/secure/asec vfat rw,dirsync,nosuid,nodev,noexec ...
tmpfs /mnt/sdcard/.android_secure tmpfs ro,relatime,size=0k,mode=000 0 0
$ ls -l /dev/block
drwxr-xr-x root     root              2012-06-18 22:41 vold
brw------- root root 179, 2 2012-06-18 22:41 mmcblk0p2
brw------- root     root     179,   1 2012-06-18 22:41 mmcblk0p1
drwxr-xr-x root     root              2012-06-18 22:41 platform
brw------- root     root     179,   0 2012-06-18 22:41 mmcblk0
brw------- root     root      31,   3 2012-06-18 22:41 mtdblock3
brw------- root     root      31,   2 2012-06-18 22:41 mtdblock2
brw------- root     root      31,   1 2012-06-18 22:41 mtdblock1
brw------- root     root      31,   0 2012-06-18 22:41 mtdblock0
Ok, here on the Sony Ericsson Xperia Active we see the FAT partition /mnt/sdcard is device 179,1 hence the next partition must be 179,2 and it's named mmcblk0p2. Note that during our init, busybox creates the device node directly in /dev without the /block/ directory Android uses.
#!/sbin/busybox sh

# initramfs pre-boot init script

# Mount the /proc and /sys filesystems
/sbin/busybox mount -t proc none /proc
/sbin/busybox mount -t sysfs none /sys
/sbin/busybox mount -t tmpfs none /dev

# Something (what?) needs a few cycles here
/sbin/busybox sleep 1

# Populate /dev
/sbin/busybox mdev -s

# Mount the root filesystem, second partition on micro SDcard
/sbin/busybox mount -t ext4 -o noatime,nodiratime,errors=panic /dev/mmcblk1p2 /mnt/root
# Clean up
/sbin/busybox umount /proc
/sbin/busybox umount /sys
/sbin/busybox umount /dev

# Transfer root to SDcard
exec /sbin/busybox switch_root /mnt/root /etc/init
- Precompiled busybox from busybox.net
The file system of this initramfs is very minimalistic and only contains the /sbin/busybox and the mount points /proc, /sys, /dev and /mnt/root. Or to be on the safe side, use the original initramfs and just add /sbin/busybox, a mount point /mnt/root and replace init with the script above.
We'll need the systems base address, i.e. where the RAM begins. To get it from your original kernel zImage, check for /proc/config.gz in your running kernel or use the extract-ikconfig script on the kernel binary. This script is included in the kernel source.
$ extract-ikconfig zImage | grep PHYS_OFFSET
CONFIG_PHYS_OFFSET=0x00200000
Looking for "System RAM" in /proc/iomem may also give you a clue of the base address.
Now we can create the new boot image.
At your desktop computer
# mkdir my-initramfs
# cd my-initramfs
# mkdir -p proc sys dev mnt/root sbin
# cp /my/arm/busybox sbin/busybox
# cp /above/init init
# chmod a+x init sbin/busybox
# find . | cpio --quiet -H newc -o | gzip > ../initramfs.cpio.gz
# cd ..
# mkbootimg --base 0x00200000 --kernel zImage --ramdisk initramfs.cpio.gz -o my-boot.img
The kernel zImage is your original kernel. mkbootimg is a part of Android OS build but and can be found pre-compiled at various sites. You can download your original boot image from your device, from your vendor or from less official sources on the Internet, all depending on your type of phone and its openness. One feature of having a locked bootloader, is that if an image is flashable, it must be genuine (i.e. its signature verifies). XDA Forum is a good starting point, whatever method you chose.
If you prefer running a custom ROM (e.g. CyanogenMod), you can of course use its boot image instead of the device's original ROM.
- Utility to unpack the boot image (gives you the base address as well)
- XDA Forums
- Howto Unpack, Edit, and Re-Pack Boot Images
- How to compile
mkbootimg - Finding the base address
We sit on our newly created image my-boot.img for a while now, while finishing the rest. Do not flash it yet.
Creating the Debian root file system
Mount your SDcard, if not already mounted. I assume you've mounted it as /mnt/debian. If you prefer Ubuntu or some other Debian based distribution, the steps are the same. Replace the mirrors accordingly.
Chose a Debian mirror close to you, and begin to create the Debian root filesystem.
At your desktop computer
# apt-get install debootstrap
# mkdir /mnt/debian
# mount -t ext4 /dev/sdf2 /mnt/debian
# debootstrap --verbose --arch armel --foreign squeeze /mnt/debian http://ftp.se.debian.org/debian
# umount /mnt/debian
This is only half of the Debian installation. Now we need to complete the other half. Either run this in an emulator (qemu-system-arm or Android Virtual Device (AVD)) or maybe easier, directly at your Android device as root. Here I'm using /root as a temporary mount point on the device since it happens to be unused in Android (actually, read-only).
On your Android device
# mount /dev/block/mmcblk1p2 /root
# export PATH=/sbin:/usr/sbin:/bin:/usr/bin:/system/bin
# busybox chroot /root /debootstrap/debootstrap --second-stage
# echo 'deb http://ftp.se.debian.org/debian squeeze main' >/root/etc/apt/sources.list
# mount -t proc none /root/proc
# mount -t sysfs none /root/sys
# mount -o bind /dev /root/dev
# mount -t devpts none /root/dev/pts
# export TMPDIR=/tmp
# busybox chroot /root /bin/bash
# apt-get update
# apt-get install openssh-server
# passwd root
# exit
# sync
Now shutdown your device and remove the SDcard.
Here you'd actually ran Debian on your device! But chroot:ed below Android, we want the reverse. But now we got a complete GNU/Linux system with SSH server and all. Still some tinkering needs to be done. If apt-get update didn't work, check your /etc/named.conf.
Here below you find a ready-made root file system up to this point described, i.e. with a ssh-server installed. The root password is "root". Feel free to change it. ;-)
- Ready made root file system (128MB)
Note that this file system is as of up to this point in this tutorial. It still needs work, e.g. installing your Android root in /android, adding the init scripts etc. This can't be pre-made, since they differs from device to device.
Creating the new Android root file system
Mount the SDcard in your ordinary GNU/Linux machine again.
Unpack the original boot image initramfs to /android on SDcard GNU/Linux partition. This is the new Android root. Create directory /android/log. Note that since the new Android root here isn't a mount point but a subdirectory, Android will not succeed re-mounting it as read-only. If you believe this is a problem, you can instead create the Android root on a separate partition on the SDcard, mounting it as /mnt/root/android in the init on the initramfs above directly after mounting /mnt/root. Note that in this case, /android/log may not be used for boot logs by /etc/init below, since it's read-only. You may solve this by mounting a tmpfs or simply remove the logging by /etc/init.
Android normally only accepts four partitions on the SDcard (vold limitation). If you don't want to waste one of them for the small root file system, you can loopback mount (--bind) /android to /mnt/android making it a mount point. This mount point you then can set to read-only using remount. Note that you must do a remount, because a bind-mount can not change the flags of the original file system initially. You'll have to do this remount explicit yourself in init.stage2 using /bin/mount in this case. But initially I suggest you just let the root be writeable until you get everything up and running. This can be done later -- or not at all.
Making a boot image is done with the Android OS build kit mkbootimg. There's no official tool splitting such an image, but it's quite trivial and lots of scripts available to do this. The image is basically just a concatenation of the kernel zImage and initramfs.cpio.gz.
Some finishing scripts to tie all together
Our new initramfs transfer init control to /etc/init on the GNU/Linux partition. Use this script below. You also need to copy the busybox to /sbin.
/etc/init of SDcard ext4 filesystem
#!/sbin/busybox sh

#
# Debian environment boot init script
#
# Leave all the initialization process to the Android init to handle
#

# Launch delayed init script
/etc/init.stage2 >/android/log/boot.log 2>&1 &

# Transfer control to Android init - never returns
exec /sbin/busybox chroot /android /init
Also make sure you copy the busybox to /sbin in this file system as well. Note that log from init.stage2 is stored in the Android file tree so you can access in from Android in case the Debian-level ssh server didn't start due to some mistake done in for example /etc/rc.local.
What this script does, is forking of a secondary delayed script the Debian environment executes once the Android init is done. It then transfers control to the Android original init, still running as pid 1 of course.
The secondary script init.stage2
/etc/init.stage2 of the SDcard ext4 filesystem
#!/sbin/busybox sh

#
# Delayed Debian environment boot init script
# Not really init (not pid 1) but a fork of it.
# The real init is right now executing in Android chroot
#

/sbin/busybox echo "`/sbin/busybox date` Debian init stage2 started"

# Wait for Android init to set up everything
# wait for dev to be mounted by Android init
/sbin/busybox echo "`/sbin/busybox date` Waiting on Android to mount /dev"
while [ ! -e /android/dev/.coldboot_done ]; do
   /sbin/busybox sleep 1
done
# wait for Android init to signal all done
/sbin/busybox echo "`/sbin/busybox date` Waiting on Android init to finish"
while [ -e /android/dev/.booting ]; do
   /sbin/busybox sleep 1
done

# Mount the /proc, /sys etc filesystems
/sbin/busybox echo "`/sbin/busybox date` Mounting /proc /sys and /dev"
/sbin/busybox mount -t proc none /proc
/sbin/busybox mount -t sysfs none /sys

# Mount /dev from the Android world
/sbin/busybox mount -o bind /android/dev /dev
/sbin/busybox mount -o bind /android/dev/pts /dev/pts
/sbin/busybox mount -o bind /android/dev/socket /dev/socket

# All done, now we can start stuff

export PATH=/sbin:/usr/sbin:/bin:/usr/bin

/sbin/busybox echo "`/sbin/busybox date` Running /etc/rc.local"

# Start selected servers
/etc/init.d/rc.local start

/sbin/busybox echo "`/sbin/busybox date` All done"

exit 0
Basically this only waits on Android init, then sets up everything nessesary for Debian such as devices, proc and sys mounts, and executes /etc/rc.local.
You see we mount /dev loopback from the Android root. Because of this, you must remove any devices in /dev populated by debootstrap, or else this mount will fail.
My /etc/rc.local looks like below.
/etc/rc.local of the SDcard ext4 filesystem
#!/bin/sh -e
#
# rc.local
#
# This script is executed at the end of each multiuser runlevel.
# Make sure that the script will "exit 0" on success or any other
# value on error.
#
# In order to enable or disable this script just change the execution
# bits.
#
# By default this script does nothing.

/etc/init.d/hostname.sh start
/etc/init.d/ssh start

exit 0
Note that init make sure everything here is logged to /android/log/boot.log. This is in the case the ssh-server does not start, you may see why in the file /log/boot.log by adb shell to Android.
Install it
If everything went well so far, it's time to install your customised boot image. Here below I assume you have an unlocked bootloader supporting fastboot, but you might have to use some other tool to flash your phone depending on model.
First enter fastboot mode on your Android device. This is done with some magic key combination during power off and is phone specific. You may try VolumeUp or VolumeDown as you either turn on the phone or connect its USB cord to the computer - or Google your phone model plus "fastboot".
On you desktop computer
# fastboot -i 0x0fce flash boot my-boot.img # fastboot -i 0x0fce reboot
The marked "-i 0x0fc" tells fastboot the vendor of the device to flash and you must change this matching your phone. You don't want to flash wrong Android device. If you are sure only the right one is connected (see with "fastboot devices") you may exclude this parameter.
All done, you now run Debian integrated with Android The Matrix Way. Run ssh to it as user root with the password you specified.
Additional tinkering
/etc/group
The Android environment is quite restricted. If you plan to run as non-root in the Debian environment, you'll need to add yourself to some Android groups to get access to network and such. The groups of the Android user shell serves as a template. Most important are the inet group 3003 to get network access and 1015 to write on the SDcard.
On an android device as user shell
shell@android:/ $ id
uid=2000(shell) gid=2000(shell) groups=1003(graphics),1004(input),1007(log),1009(mount),
  1011(adb),1015(sdcard_rw),3001(net_bt_admin),3002(net_bt),3003(inet),3006(net_bw_stats)
The complete set of Android user uid and group gid can by found in system/core/include/private/android_filesystem_config.h (yes, it's hard-coded).
/etc/mtab
To make df happy, make this a symlink to /proc/mounts
# ln -s /proc/mounts /etc/mtab
Still, df will produce a somewhat confusing output due to the double mounts of devices in the different roots. Not to worry, this is only cosmetic.
locales
You don't get any localised locale installed by default. If you'd like that, apt-get install locales, edit /etc/locale.gen to select what locale you'd like, then run locale-gen.
Setting the system default time zone
# dpkg-reconfigure tzdata
Using the GNU/Linux Debian environment
Connectivity
To get a Debian terminal, download the ConnectBot from Google Play and ssh-connect to localhost. Note that if you use the "local" connection in ConnectBot, you'll enter The Matrix, i.e. the chroot Android environment, and can see no signs of the Debian environment whatsoever.
|
Connect using SSH to localhost 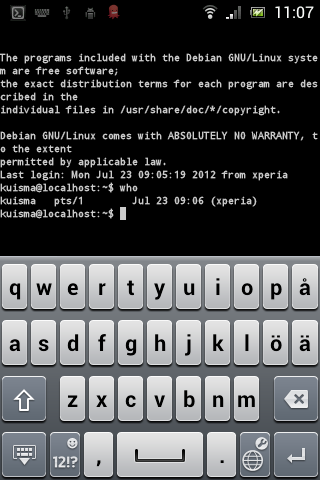 |
Connect using local connection 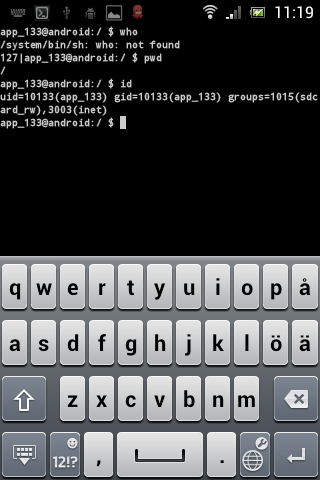 |
X11 Windows
If you want to run X11 on your device, apt-get tightvncserver and get the free android app android-vnc-viewer from Google Play.
First apt-get some desktop environment. You can use gnome-desktop-environment if you got the hardware for it, but for smaller systems I'd recommend lxde instead. Both are included in the Debian ARM distribution.
On your Android device in the Debian system via SSH
$ sudo apt-get install tightvncserver
$ vncserver -geometry 1280x752 -display :1
Running Debian GNU/Linux with Gnome on Android using the android-vnc-viewer app

(click to enlarge)
For better ergonomics, run ssh (optionally with X11 forwarding) from your favourite computer. Running the mouse pointer with the index finger over the touch screen, can be somewhat challenging. :-) Still, Gnome on the ASUS Transformer TF101 runs surprisingly well.
File access
One of the reasons motivating me to implement this is the ability to access the Android files without have to unmount/remount the SDcard.
In Gnome (Nautilus) at my workstation

As a user in the sdcard_rw group you have full access to the SDcard and as the root user all the files in the filesystem. This also makes backups easy. My devices are backuped nightly via BackupPC running tar over ssh.
The Android Media Scanner normally runs automatically each time Android remounts the SDcard. Since you are now transferring the media to the SDcard using ssh/sftp, not remounting the card, the media scanner won't run except for at boot. Download an app to start the Media Scanner manually from Google Play if you need - there are lots of them.
The Media Scanner is an index service used to catalogue media files such as MP3's and images for Android apps. If you transfer a media file using ssh/sftp but can't find it in your app, initiate a Media Scan.
Modifying the system
With the real GNU/Linux distribution on top, it's trivial to customize the device to your likings. For example the Sony Xperia Active only got 420MB internal storage for apps and data. This we'll change simply by moving /data from the internal partition to a new partition we create on the SDcard. Create the partition, copy /data to it, edit Androids init.rc (or init.vendor.rc) to mount the new one instead, and then restart. All done, no need to re-flash the device or anything.
|
Before  |
After 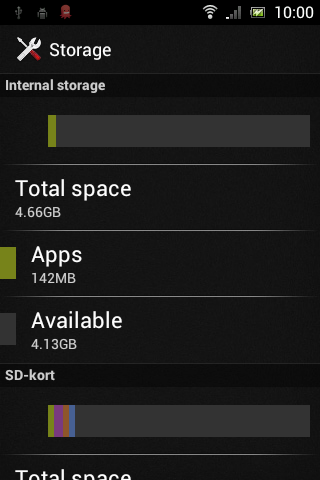 |
Total space from 420MB to 4.66GB - not bad at all. Just keep in mind Androids vold does not like more than four partitions on the SDcard by default.
Rooted
Please note that this way, the Android environment is not "rooted". This is trivial to achieve, but very much less needed, unless you have some app needing root privileges you still need to use. Myself I find giving away root privileges to apps far too dangerous.
To enter the Android Matrix from the Debian world, use chroot.
root@tf101:/home/kuisma# PATH=/system/bin /usr/sbin/chroot /android sh
root@android:/ #
This is seldom needed, since you'll perform all the work (e.g. edits) of the Android file system directly from the Debian environment, using the full set of tools GNU/Linux provides you.
Happy hacking!
Caveats
Environment variables and file descriptors
When ssh:ing into the device, remember that neither the ssh server nor your login shell is a child of Android's init. Therefore you've got no access to neither file descriptors nor environment variables created by init, especially not ANDROID_PROPERTY_WORKSPACE with corresponding file descriptor. Because of this, you can't use getprop/setprop or any command relying Android properties from the ssh session (e.g. restart adbd). To do this, you must enter the Android world via a child of init, e.g. adbd or a local ssh-server in the Android root (e.g. dropbear).
You can always enter the Android world only to adb shell back to itself.
root@tf101:/home/kuisma# chroot /android /system/bin/adb shell
shell@android:/ $
Note that this device is not rooted (ro.secure is 1), hence me ending up as the shell user.
apt-get upgrade
Running apt-get upgrade, many installations scripts restarts their corresponding daemons. Since no daemons except for them you start in rc.local are supposed to be running in the Debian environment, it might be a good idea to restart the system after the upgrade.
Some warnings
Although Debian is the root, both systems are heavily dependent on the Android system and its init, since it is the "owner" of the hardware (i.e. runs init). If Android init fails, you will not be able to ssh into the Debian machine. Even if the root is transferred to the SDcard, the Android init mounts internal partitions, /system most important. If you do some change on this partition, you might lock yourself out. This can be solved by a backup copy of the Android environment so you can restore it to the SDcard and edit /android/init.*.rc to not mount /system from internal flash but use the one you restored to the SDcard instead. Running /system from the SDcard to begin with may be a good idea if you plan to change it frequently. This way the original system partition can be left untouched. This of course goes for all the Android partitions. Use can easy increase the size for your apps by changing /data to a partition on the SDcard of whatever size you like.
Or to conclude, always keep a backup.
Of course you can implement some fail-safe in the init scripts, populating /dev, mounting /proc, /sys, setting IP address etc if the Android init fails, but I find it more practical to run /system from SDcard instead.
The Android Java machine (Dalvik) on the other hand is quite non-critical at the operating system level, so removing bundled apps (bloatware) on the /data partition is quite harmless. If you happen to remove e.g. the Home Application, you'll still be able to ssh into the Debian system restoring it from your backup.
Common mistakes
- Make sure you set execute permissions for busybox, init scripts etc.
- Make sure all mount points are there.
- Make sure
/devis a mount point and not populated with device nodes.
About Performance
Note that this is not emulation or virtualization but a runtime environment. Because of this no performance penalty whatsoever occur in neither the Android nor the Debian environment, not counting the extra one and a half second to boot the device.
If moving partitions (eg. /system and/or /data) to the SDcard for safety or to increase the size, the speed of the SDcard may affect the performance. My benchmarks shows that a class 10 card gives about the same I/O performance as the internal nand disk, though. Don't except more than 15-20 MB/s. USB disks may give you more.
Don't expect laptop performance, though. If it's primarily a GNU/Linux workstation you want, get an x86 based machine instead. The Android platform is design with resource conservation in mind, not high performance.
pstree
A typical ps tree showing the process hierarchy. Note the sshd running this pstree and a sftp server in the Debian root. All the other processes are chroot:ed to the Android root.
init─┬─adbd───{adbd}
     ├─dbus-daemon
     ├─debuggerd
     ├─dhcpcd
     ├─drmserver───{drmserver}
     ├─dropbear
     ├─glgps
     ├─installd
     ├─keystore
     ├─mediaserver───6*[{mediaserver}]
     ├─netd───4*[{netd}]
     ├─sdcard
     ├─servicemanager
     ├─sshd─┬─sshd───sshd───sftp-server
     │      └─sshd───sshd───bash───pstree
     ├─surfaceflinger───5*[{surfaceflinger}]
     ├─ueventd
     ├─vold───2*[{vold}]
     ├─wpa_supplicant2
     └─zygote─┬─LocationService───18*[{LocationServic}]
              ├─android.browser───14*[{android.browse}]
              ├─android.vending───26*[{android.vendin}]
              ├─com.asus.cm───9*[{com.asus.cm}]
              ├─d.process.acore───8*[{d.process.acor}]
              ├─d.process.media───9*[{d.process.medi}]
              ├─droid.apps.maps───31*[{droid.apps.map}]
              ├─droid.gallery3d───9*[{droid.gallery3}]
              ├─droid.gsf.login───11*[{droid.gsf.logi}]
              ├─e.process.gapps───35*[{e.process.gapp}]
              ├─ing.android.tsm───16*[{ing.android.ts}]
              ├─m.android.phone───16*[{m.android.phon}]
              ├─m.asus.keyboard───8*[{m.asus.keyboar}]
              ├─ndroid.launcher───15*[{ndroid.launche}]
              ├─ndroid.settings───16*[{ndroid.setting}]
              ├─ndroid.systemui───11*[{ndroid.systemu}]
              ├─oid.hostmonitor───8*[{oid.hostmonito}]
              ├─onFriendService───11*[{onFriendServic}]
              ├─putmethod.latin───9*[{putmethod.lati}]
              ├─s:FriendService───8*[{s:FriendServic}]
              ├─system_server───67*[{system_server}]
              ├─uance.xt9.input───12*[{uance.xt9.inpu}]
              └─3*[{zygote}]
Realize there's no connection between the process tree and the chroot file system structure. Here the init process lives in the chroot environment despite of being top of the process tree, and the ssh server sshd in the genuine top root, despite of being below init in the process tree.
Devices verified
Implemented successfully on the following Android devices.
- LG Optimus P700
- Sony Ericsson Xperia Active ST17
- ASUS Transformer TF101
- HTC Desire
- Samsung Galaxy S II (SGH-T989) (requires custom
mkbootimg, see link) - Hisense E860
- Sony Xperia NEO
- Nobis NB07 7"
Got it up on some other device? Send me a mail and I'll add it to this list.
Feedback? Questions? Suggestions?
This tutorial too basic? Too complicated? Please feel free to send me a mail!
/By Mikael Q Kuisma